Introduction
To tighten the ER spindle nut on a Taig milling machine typically two wrenches are used. This often becomes a problem when a third hand is needed to hold the tool bit in place. While searching the Internet I did not find what I was looking for, so I ended up designing my own.
Here is a description of what I did to provide a starting point for others that also would like to create a spindle lock.
Design Concept
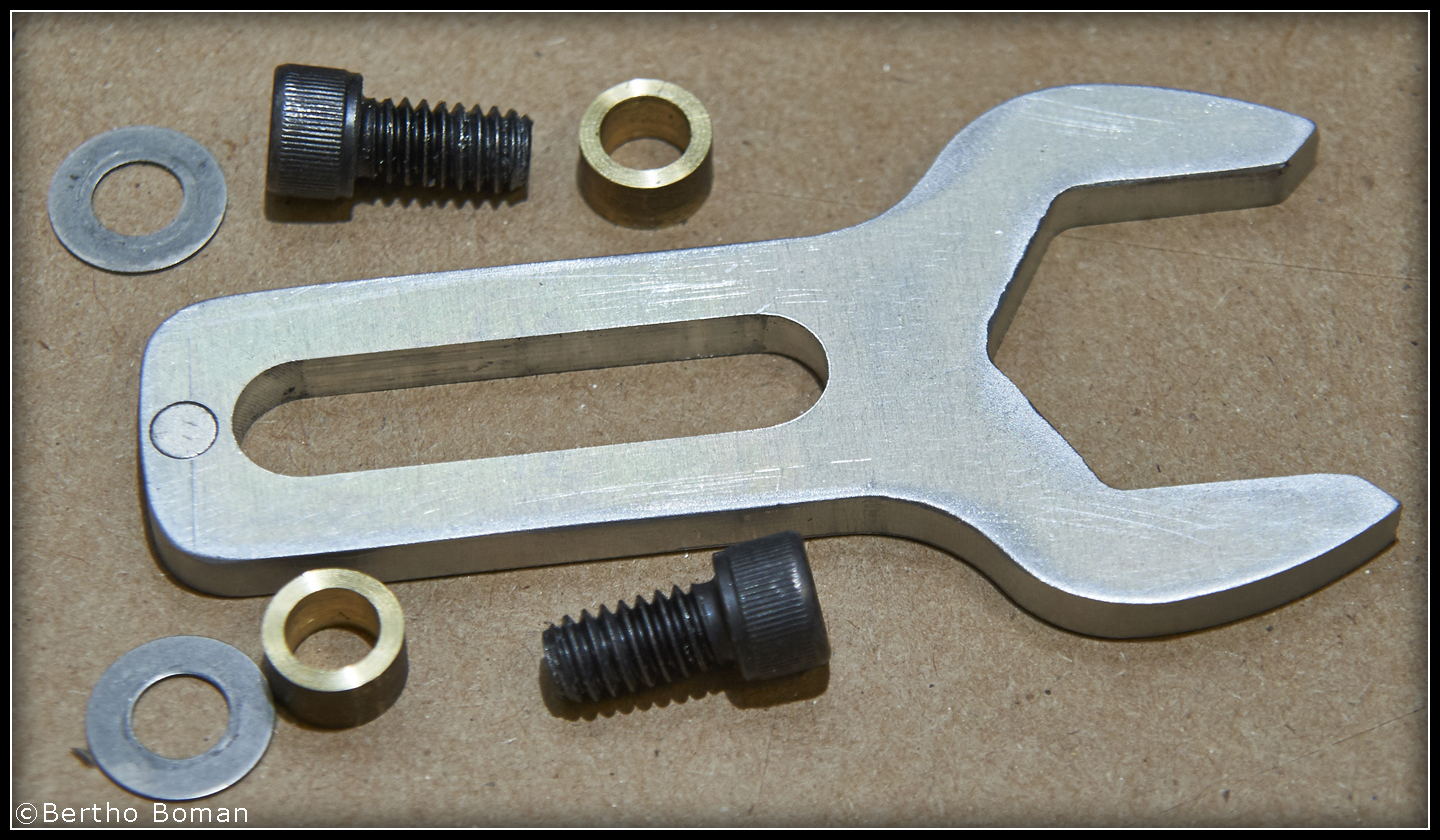
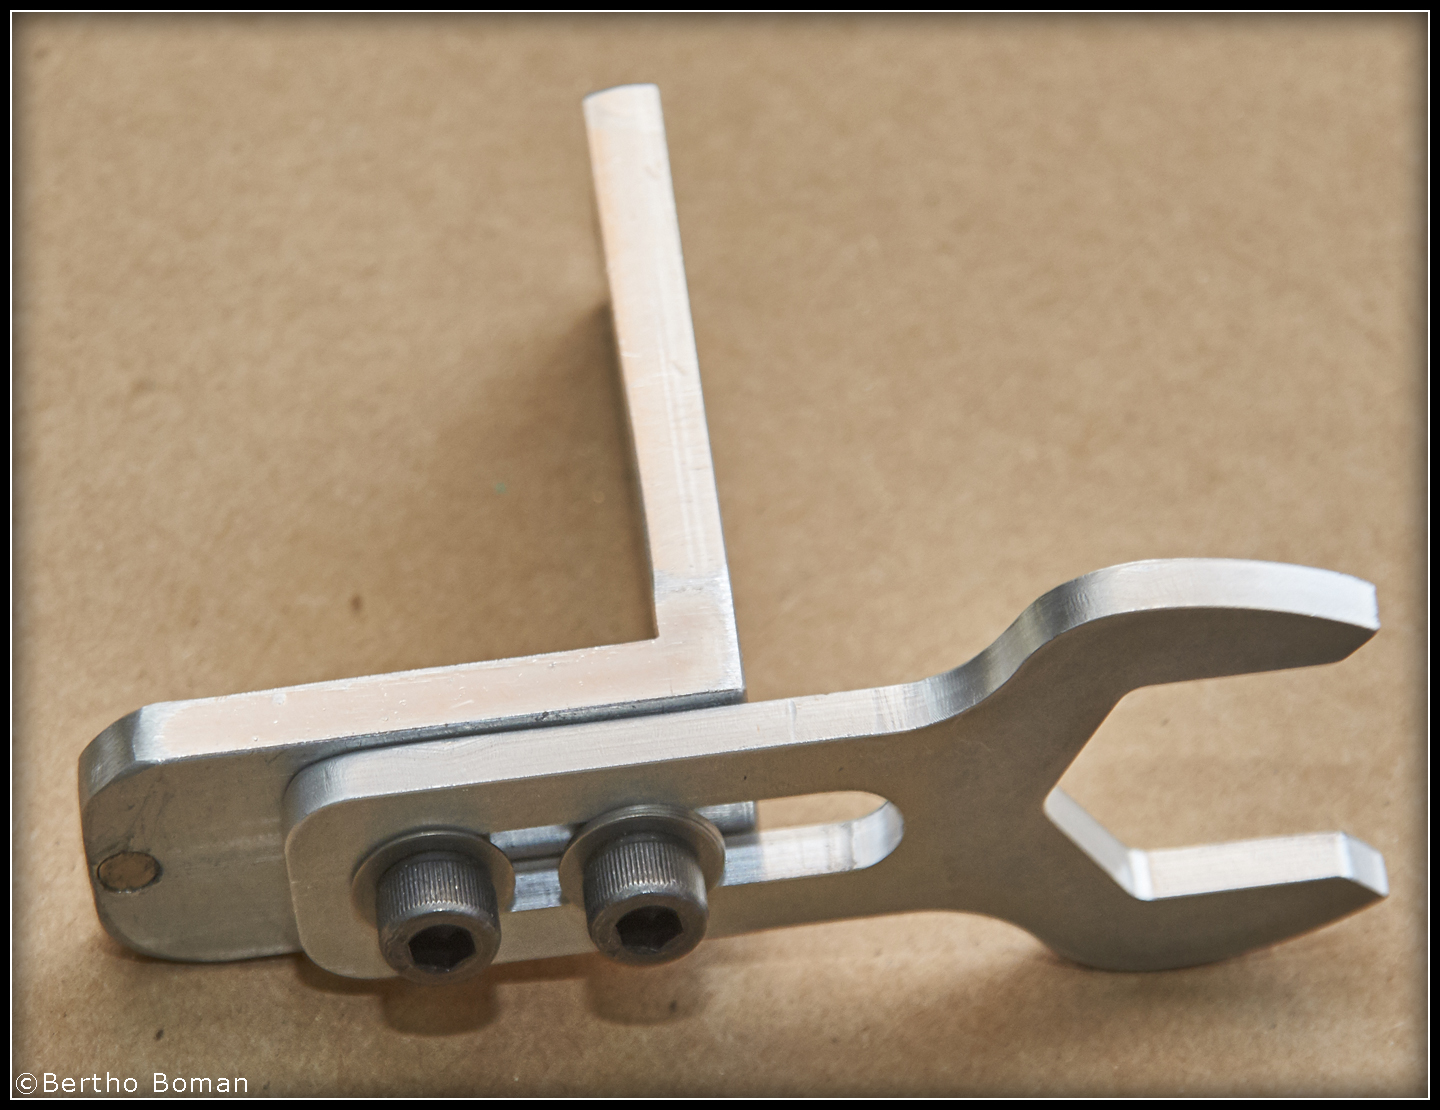
The key ingredient is of course a wrench. An important note: The ER16 nuts are 24.9mm across the flats, and the Taig spindle is 25.3mm across the flats. I machined a wrench from 5mm aluminum and it has a 9.5mm slot that is used to retain it. Basically I copied a regular one inch wrench but kept the handle straight instead of the normal angled style. The opening is 25.8mm and the slot length is 32mm center to center. The near slot center is located 34mm from the wrench's nut center.
The wrench is held in place by two bushings that are 5.2mm long and 9.4mm in diameter and drilled for clearance for two mounting screws, in this case 1/4"-20. I really prefer to work in metric, but since I am living in the USA it is often a compromise by mixing inch and metric hardware. For example, a bracket or machined piece is often machined to 25.0mm. This is a convenient size since the easy to obtain stock is one inch (25.4mm), just enough for cleanup cuts.
A small magnet was glued in below the surface with a matching one in the mounting bracket to keep the wrench in the open position. I thought about making it a spring loaded return but then I would be back requiring three hands again.
I highly recommend returning the spindle lock to the open position
before starting up the spindle
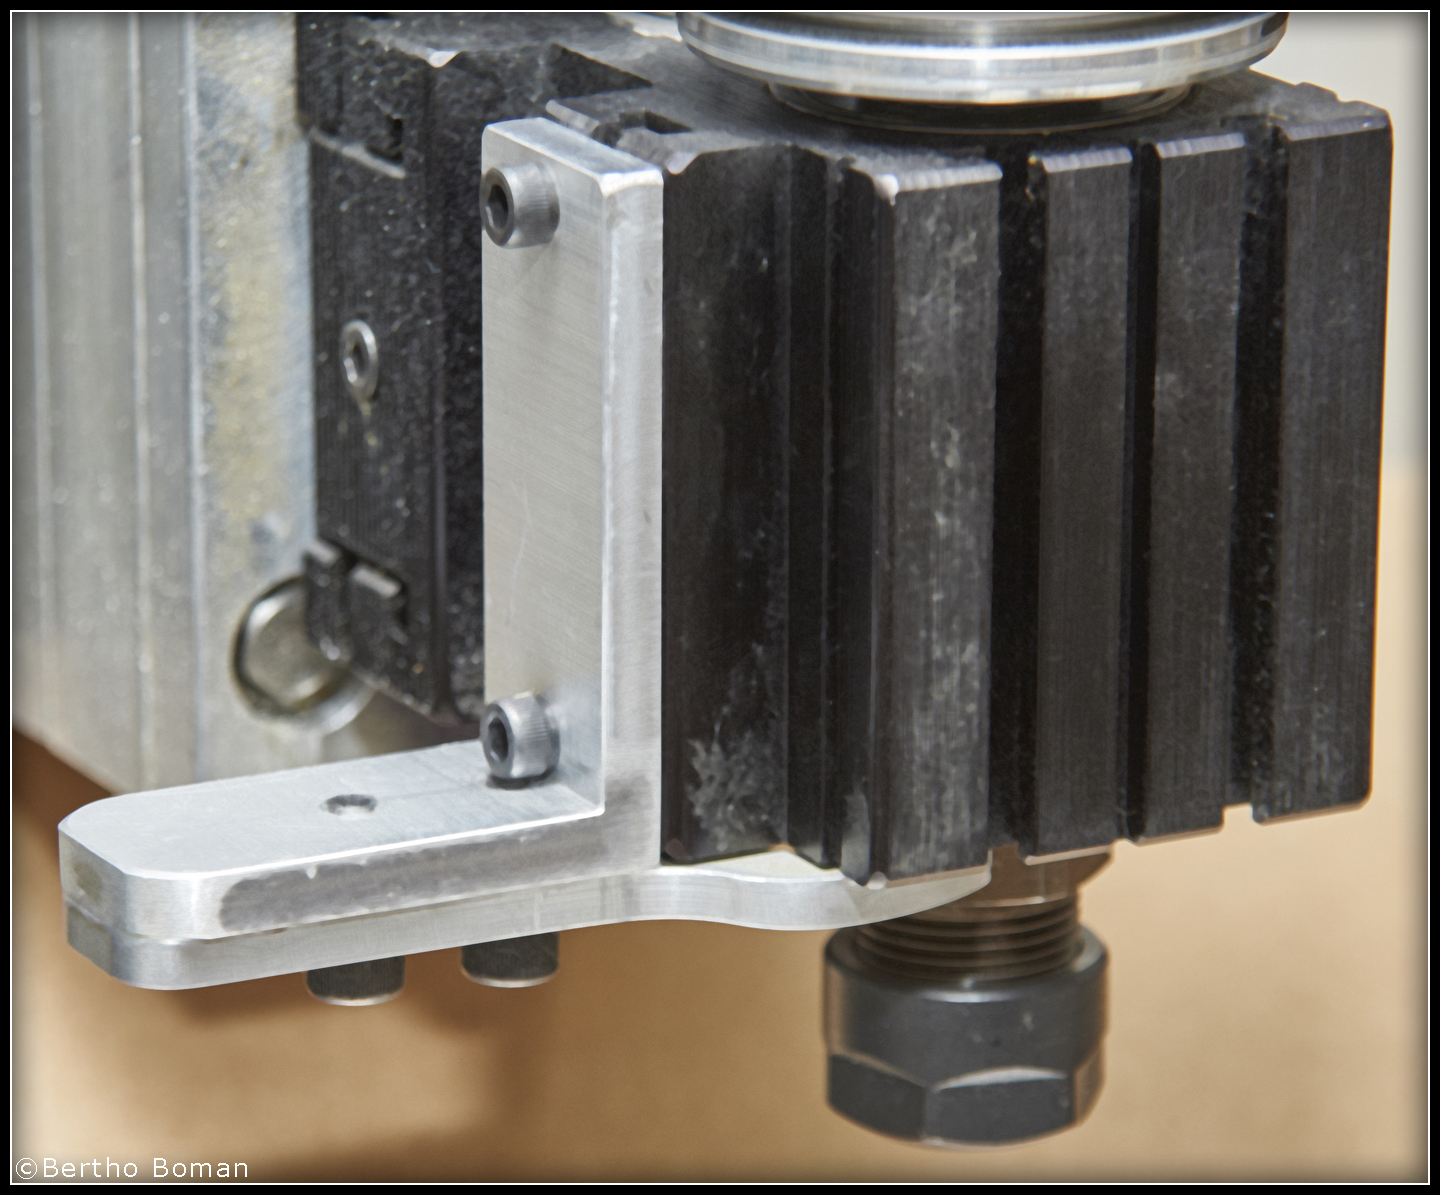
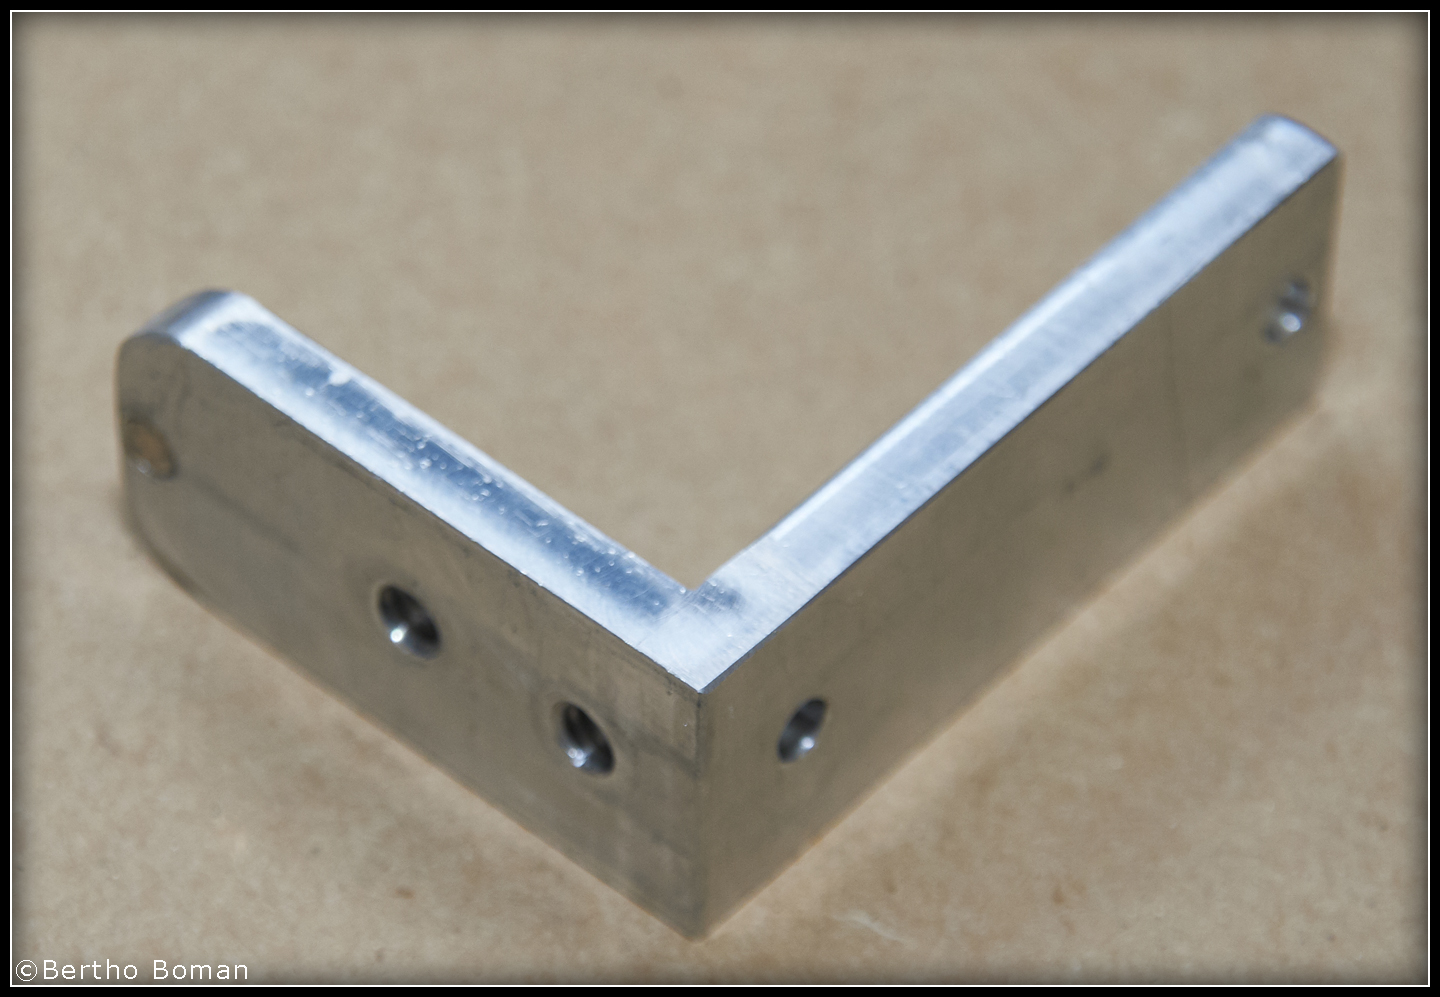
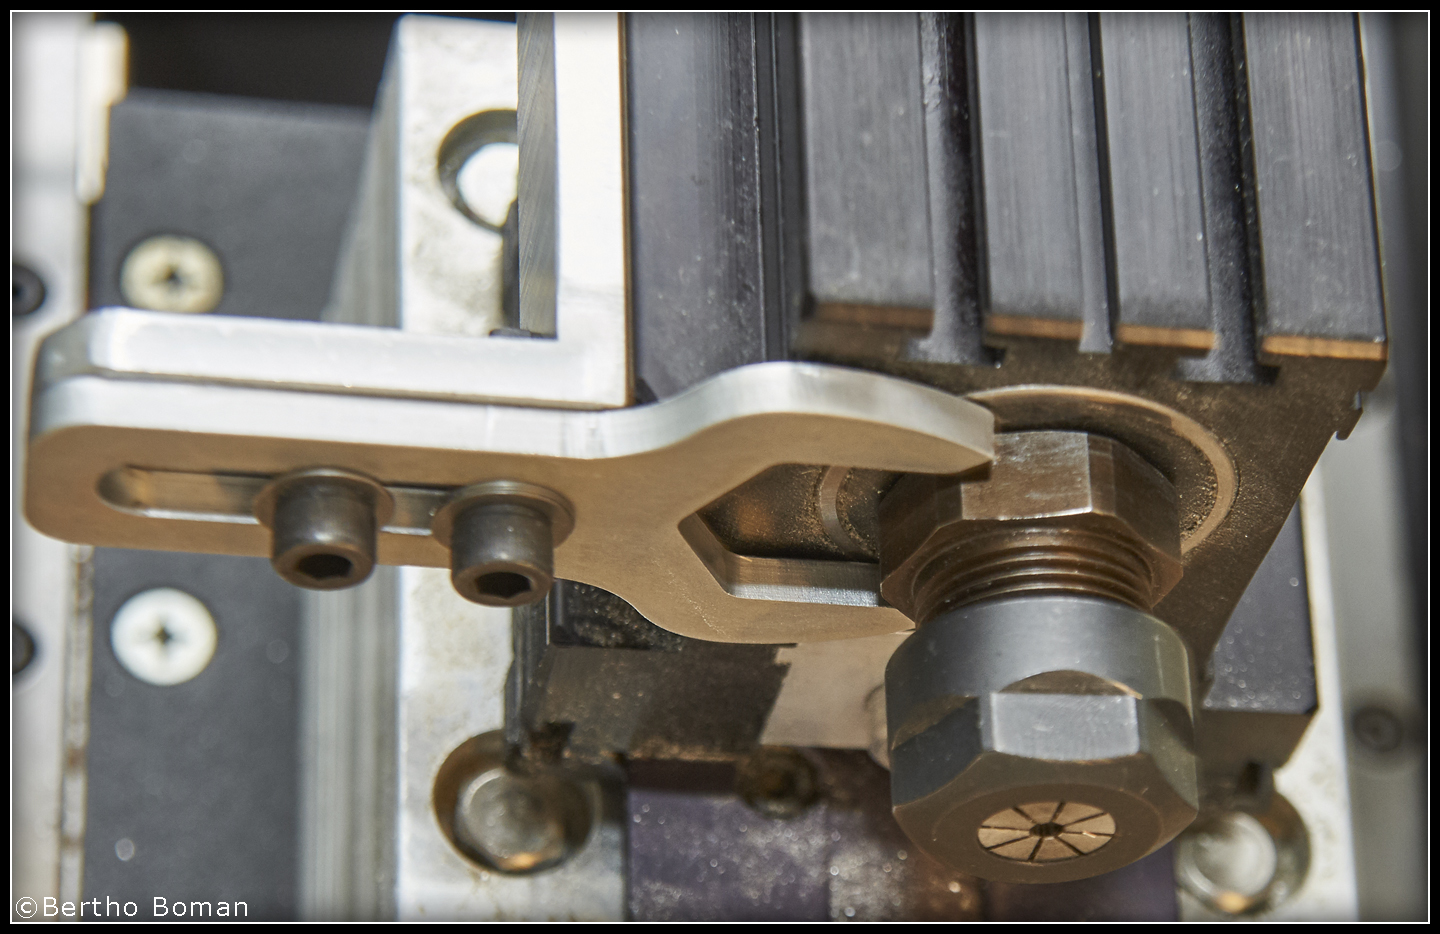
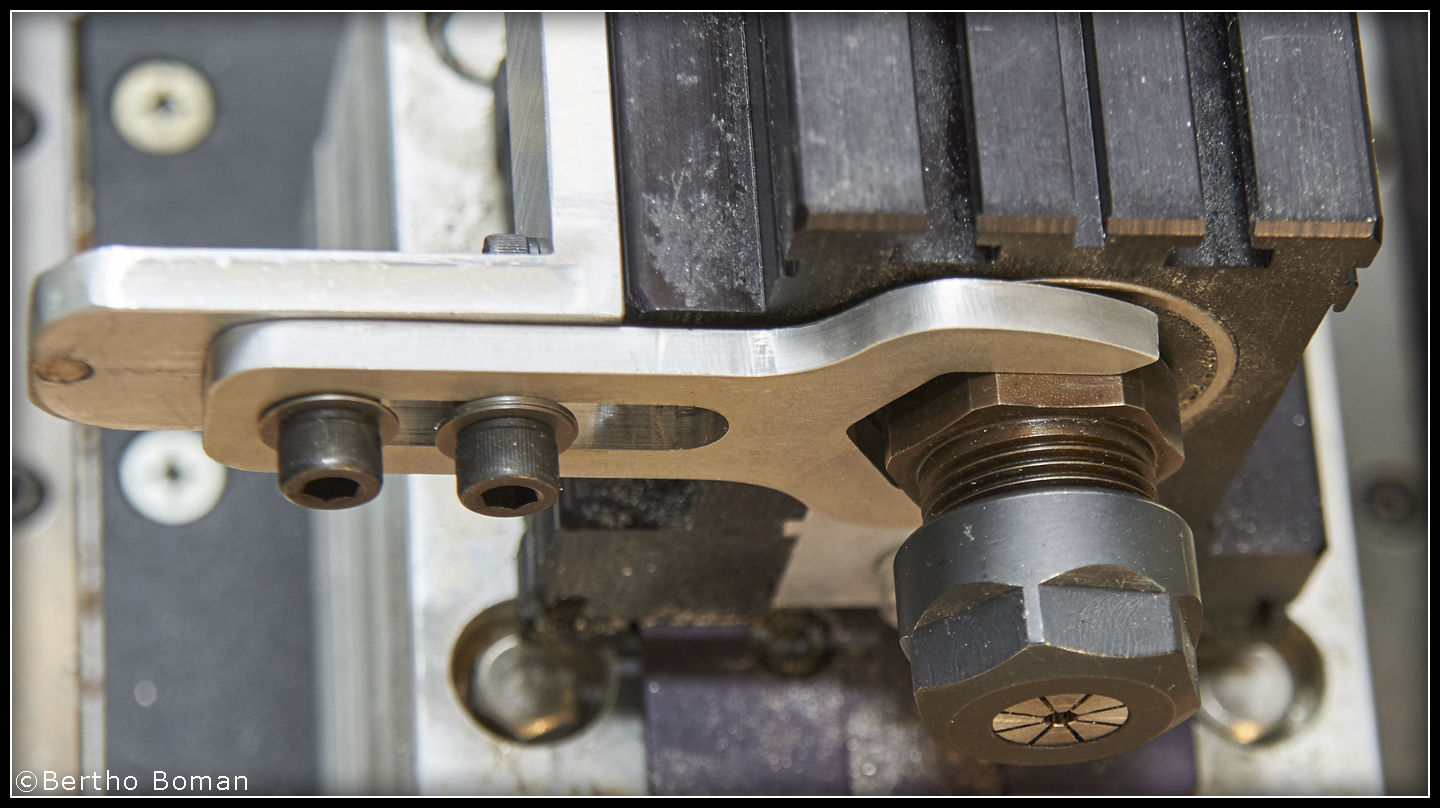
The sliding wrench is attached to the spindle head with a 25mm wide "L-bracket" with the mentioned two 1/4"-20 screws. The L-bracket, in turn, is connected by two 10-32 screws and square nuts fitting into the mounting slot in the head. The small magnet can also be seen in the picture below. The approximate dimensions are 66 x 56 x 25 x 6.3mm
Left Side - Right Side??
The sharp-eyed readers might have notice that the spindle lock is attached on the mill's left side in the T-slot. The standard Taig mill has the slot on the right side. Since I am right-handed, I like the spindle lock to be on the left side. I simply pulled out the spindle and reversed the housing. If you are left-handed, or do not care, it can of course be mounted on the default right side.
No Machine Shop?
First, I assume that a Taig mill is available. Instead of machining the spindle lock from scratch, the standard Taig wrench can presumably be used with either a machined slot, or retained by four external screws holding the handle so it can slide back and forth. The mounting bracket could be a regular hardware store L-bracket with some extra holes.
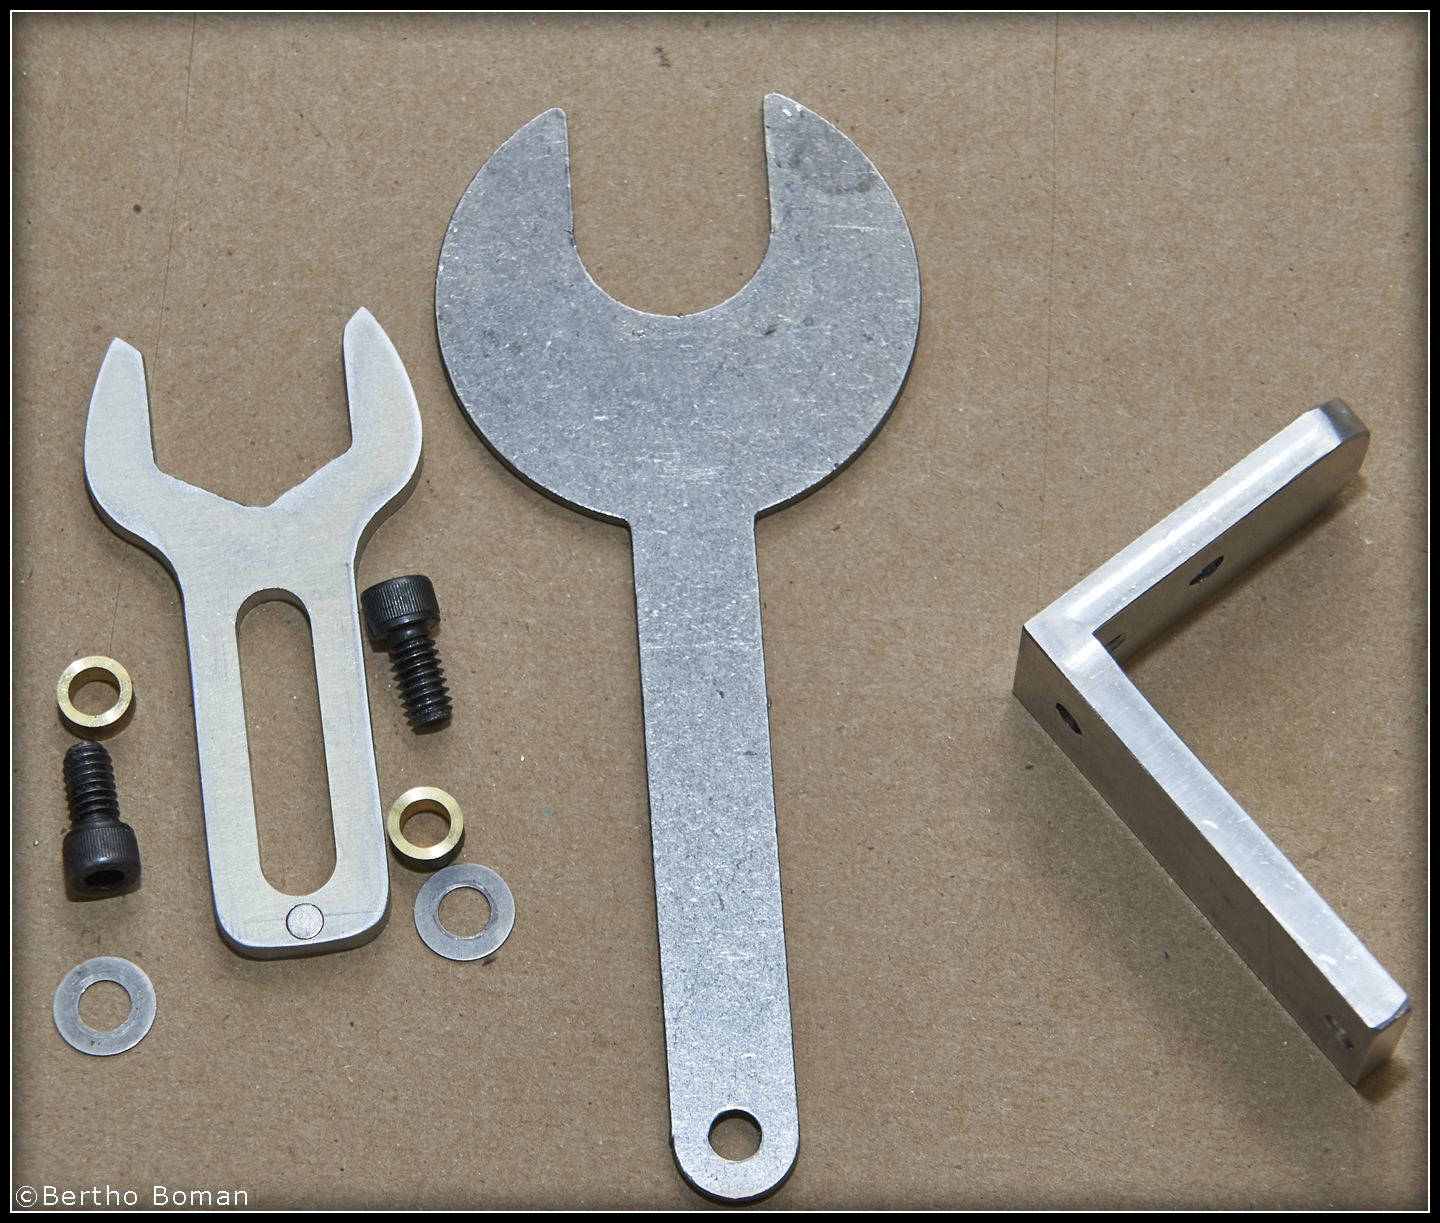
Below are some extra pictures to show the installation. It is on my to-do list to write up a detailed procedure to make the spindle lock, but in the meantime this will provide a good starting point. On the next version, I will incorporate a little handle sticking out on the front side.
"Permanent" Spindle Lock.
Here is a super-simple way to lock the spindle if no movement at all is wanted. One picture says it all.
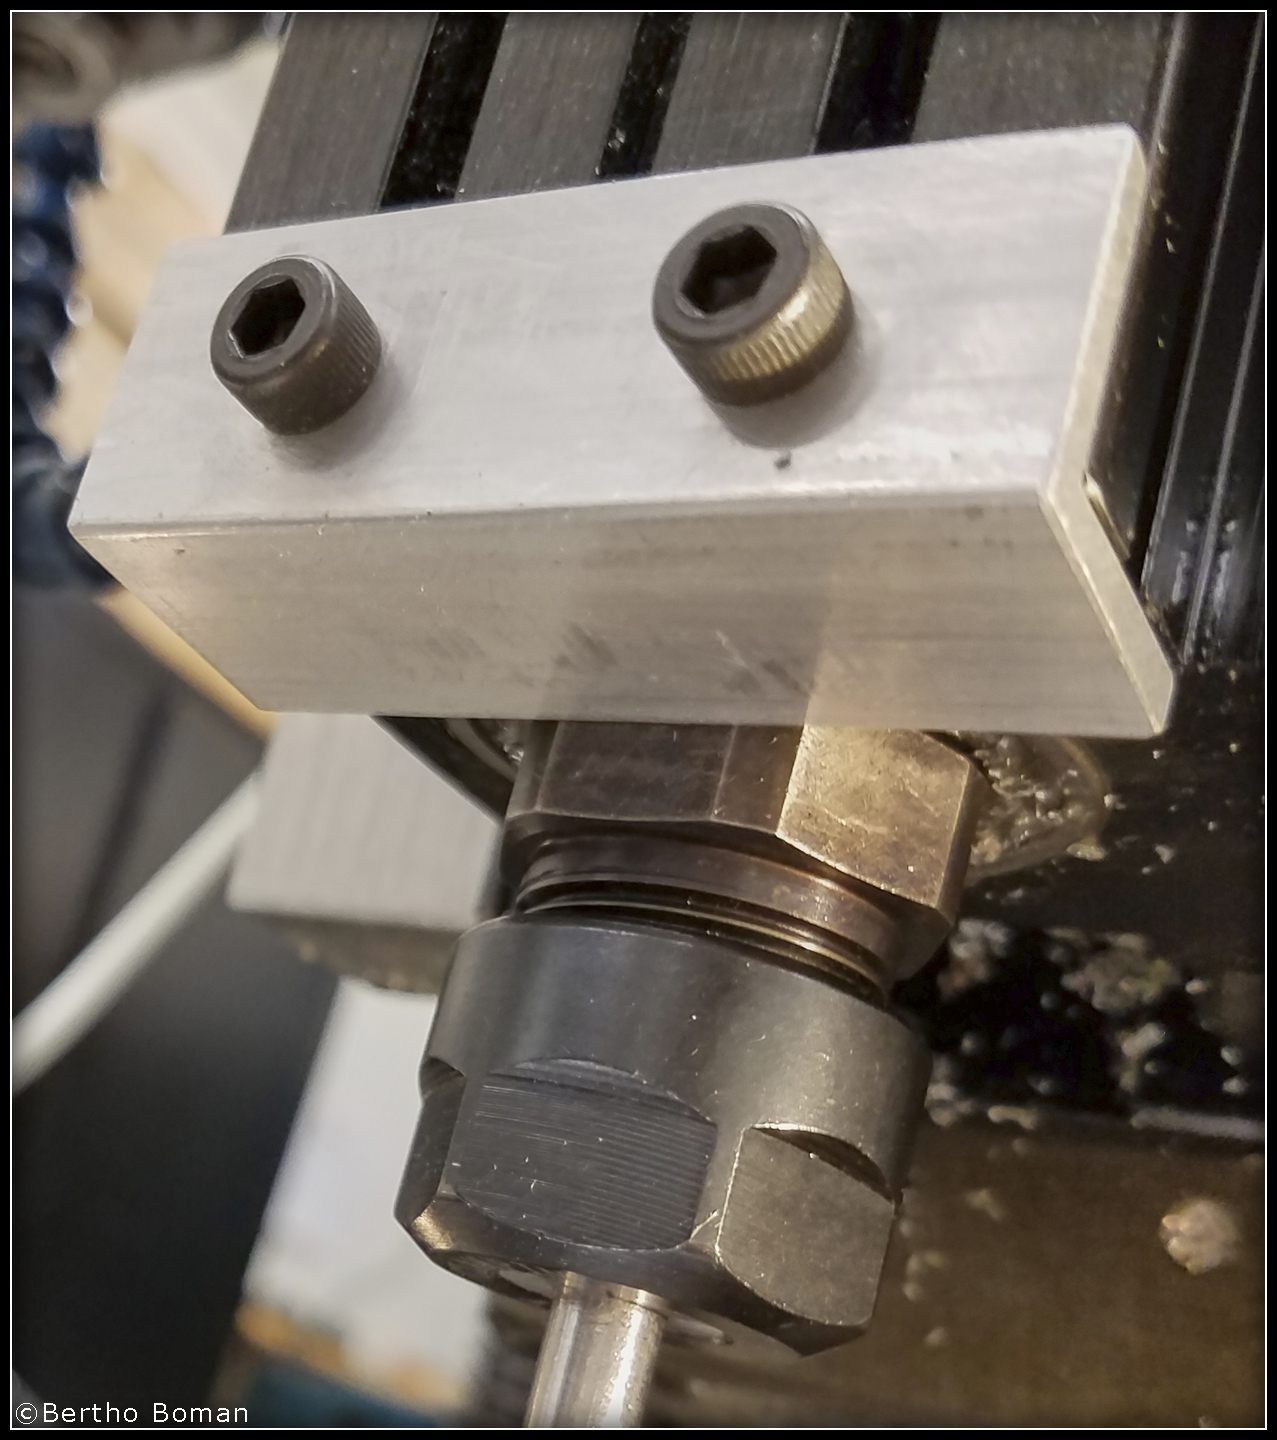
Just make sure the bottom leg is long enough to securly lock the nut.
Bertho Boman
Vinland Corporation
11600 NW 20th Street
Fort Lauderdale
FL 33323
(954) 475-9093
Email: boman33 at vinland dot com
www.vinland.com
|