| Home |
| Misc. |
|
a Pictorial Sequence 2-December-2009 Bertho Boman |
|
|
|
|
Introduction:
This is written not as an instruction on how to built a similar lathe, it is intended to give the readers ideas on how to implement their own versions as needed for their applications Overview: The base is my general purpose mechanical breadboard area. It was done many years ago and is made from a large aluminum U-channel that has been milled flat and drilled and tapped for 1/4-20 every inch. I have several smaller versions that I use for mechanical applications and as bases for optical measurement equipment. On the base, I mounted a spindle for a Taig milling machine with ER-16 collets. That was the only new item that I had to purchase just for this project besides the stepper drivers. The spindle is driven by a DC motor and speed control. Happily, I had a Sherline motor available so it got bolted onto the base too. The goal here is to mix and match and use what is easily available. Finally, X and Z slides were bolted onto the base and ballscrews with steppers attached are used to drive the slides. I added a Gecko G540 3 axis driver which forms a very convenient small package. Of course, it is controlled by Mach3 CNC software which works great and has super good support.
There is an air operated collet that is opened and the material is pulled out by the tool bit. After machining the piece is broken off and using compressed air it is blown into the brass collection tube that goes to a collection box. 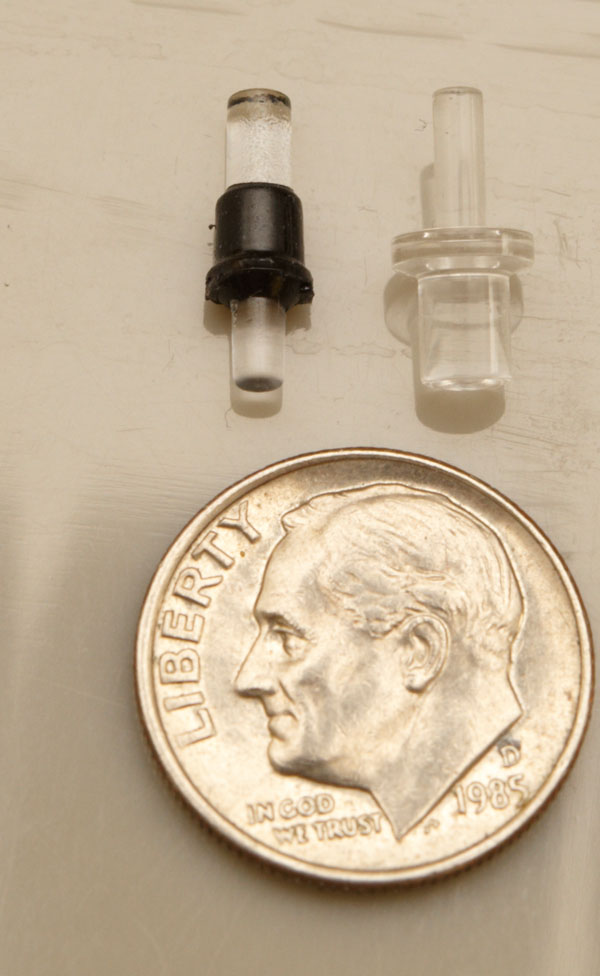
They are made from acrylic running 10,000 RPM and using a strong jet of compressed air to blow away the scarf and to keep things cool. They are optically polished as a secondary step. Actually, the left one in the picture is a sample that was made through injection molding. 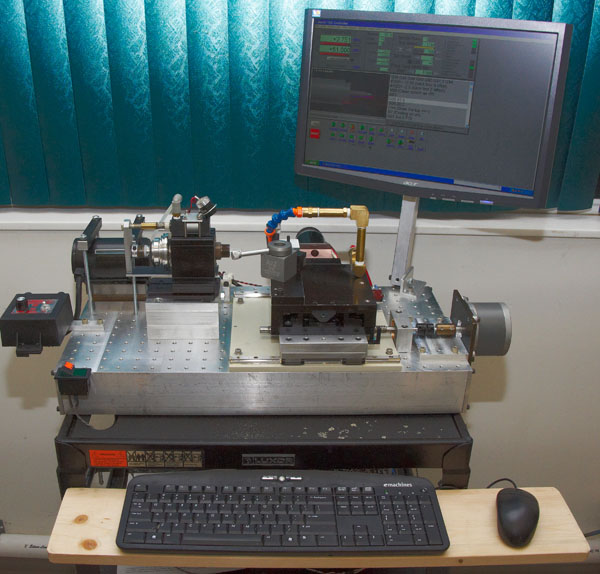
The lathe is self-contained by mounting it on a cart. The middle shelf has the electronics, the bottom shelf a small PC with a UPS and there are also air solenoids for controlling the different operations. Even the display is attached to the base. 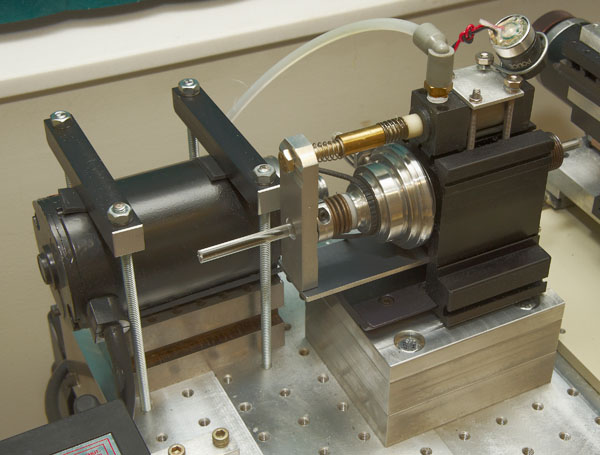
The Taig spindle is raised up using spacers. The Sherline motor rests on rubber pads in a V-block. I have a fiber-optic reflective sensor for measuring the RPM. One section of the pulley is painted black. 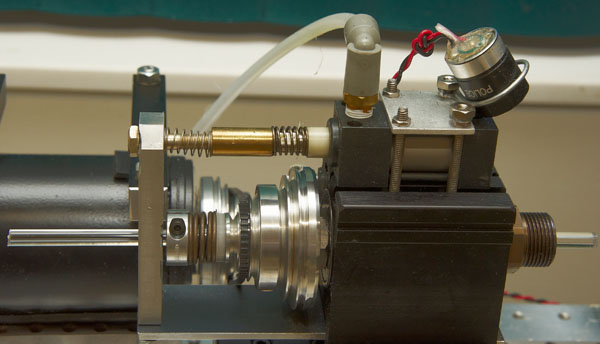
I made a custom long collet extending all the way through the spindle and a clamp ring is tightened up at the end of it. Between it and the pulley is a stiff spring that provides closing force on the collet. To open the collet, the air cylinder is activated by the Mach3 software and it pulls the vertical bar that in turn push on the clamp ring to compress the spring. The bar is centrally located and it has a clearance hole for the material to pass through. The bottom of the bar is attached by two screws that are slightly loose so it can wiggle in the joint. The big spring on the solenoid returns the single acting solenoid to its home position and the smaller spring keeps the bar away from the collar when running. Note that there is no contact or friction while the spindle is running. 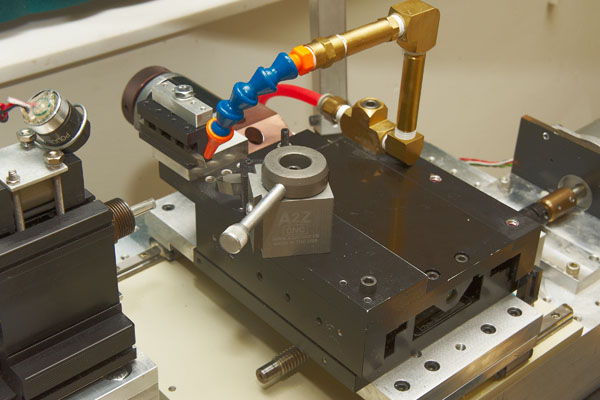
The Z slide is made from THK linear bearings. Riding on top of them is another breadboard plate with a one inch hole pattern. To that one is mounted a self-contained X slide with a built-in stepper and ballscrew drive. On the X slide are mounted a front and a back tool holder. I am not happy with the A2Z toolholder since the cam action is inherently flawed. Once I get some spare time I will make a new and proper cam for it. Riding on the X slide is the air cooling/cleaning nozzle. It is also controlled by an air solenoid. 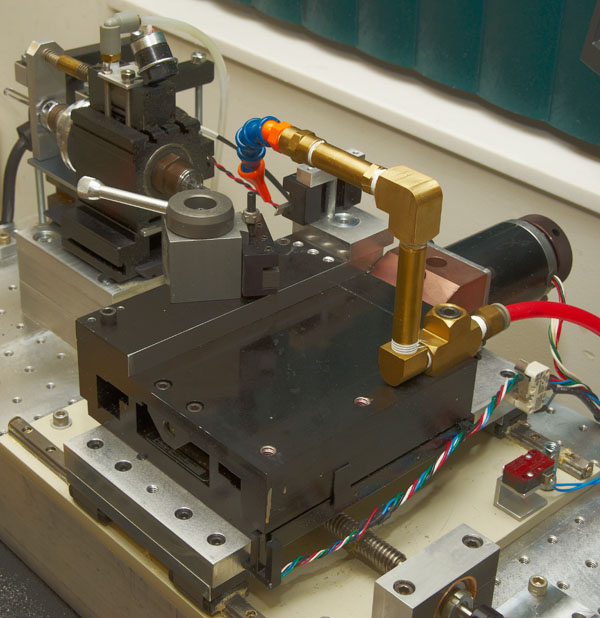
The home and limit switches are temporary. I need some spare time to clean them up. The X-switch is extremely accurate but needs to be placed in a protective cover. See: Opto Home Sensor Next Step
Hopefully this will inspire some people to try the custom design route instead of just buying off-the-shelf equipment, with often not as good accuracy as can be achieved as shown. Bertho Boman
|